Monday, February 17, 2014
Flirty Fade
Using a teal and purple base colour apply two coats carefully. Wait to dry then choosing a colour for your fade using either a nail art pen or brush, apply from tip to middle on two fingers in a quick sweeping motion to create an uneven fade look. On the other fingers apply from cuticle to the middle of the nail in the same sweeping motion.
Wait to dry and seal with your top coat!
Enjoy playing around with this design.
Nail Polish:
BarryM Gelly Hi-Shine Nail Paint - Greenberry
Barry M Nail Paint - Fuchsia
Generic Nail Art Pen - Glitter Blue.
Sunday, November 3, 2013
Holographic Wonder
The consistency is a little weak and you do need to apply one thin base coat and then one or too liberal coats on top to create the effect. I also found that it was essential that each coat were distributed evenly or else the effect was somewhat lost in the gentle uneven surface. I also found that my clear top coat somewhat dulled the shine, and a holographic print with no shine is pretty useless!
The colour range was somewhat limiting I was supposed to have a light and dark shade of each colour, blue, pink, purple, red and orange. But the differences were slim to none and could not really tell the difference.
One final tip, shake well to make sure you have perfect balance between shimmer and colour, and just have fun. These holographic nails will look great on their own or as a statement nail as part of a mix for the holidays as we now lead up to Christmas!
So search eBay if your interest has been peaked. There are plenty of reputable sellers selling holographic nail polish for decent prices. Most ship from the far east though so expect long wait from dispatch to receiving the item!
Happy shopping, Happy nails and Happy Halloween. (Belatedly)
Friday, October 18, 2013
Haunted Halloween
So Happy Halloween and have fun re-creating these simple designs.
Tuesday, October 8, 2013
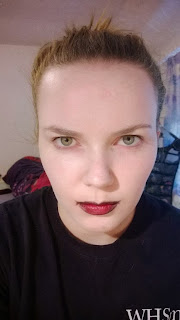
Feeling Ghoulish ... Halloween makeup inspiration.
Makeup used:
MUA eyeshadow palette £4 from superdrug.
MUA black liquid eyeliner £1 from superdrug.
Avon eyeshadow quad.
Red lipstick
Black Khol eyeliner.
Light foundation, or powder makeup.
Brushes to blend.
Start with a pale foundation or powder makeup to provide as a base, I used a mix of an airwhipped light foundation by Collection 2000 in biscuit mixed with Stargazer's white foundation. However anything that is paler than you will work as well, the idea is to make you look ill and pale. So anything that will achieve this is a winner.
Thursday, August 29, 2013
Snap CRACKLE Pop!
Through a miss-read description on eBay I ordered WAH Nails special edition crackle nail polish for Models Own, in Pink!
I had thought it was just your bog standard nail polish! However this is the best crackle nail polish I have ever used, it never fails it works EVERY time perfectly. Even if you accidentally apply unevenly the product still produces great crackle effect. The great thing about it being pink, means that I can play down the effect or play it up dependant on the base colour. Here I decided to go for subtle using a light mauve shade from Barry M, and then using a corresponding match to the crackle in block on my ring finger.
Super easy to do, took about 15minutes to do, and it looks great!
Saturday, June 22, 2013
Feeling Heroic
A little different for a catch up post, I've been neglecting my blog a little. But in honor of the hype of super hero films out at the moment, like Man of Steel I played around with some makeup to create this superhero style look.
Super easy, just using various eyeliners and eyeshadows blending them together to create a smooth airbrushed look that fades out to make it look like its infused onto my face. I often do things like this when bored or wasting time, I am the worlds best procrastinator. This is the result of today's procrastination. Hope you like it and keep checking out my blog for more updates.
Tuesday, May 14, 2013
3D Deco Pastel Nails
Following up from the previous post on pastel nails, I decided to work on that same nail art wheel and go down the 3D deco style nail. After all everyone likes a little sparkle and bling in their lives. I buy the gems, bows and pearls off of eBay. The bows and gems come in dosset boxes separated by colour which is super handy, there are plenty of options to find on eBay if you type in 3D nail accessories, you can buy all kinds sof bling to sparkle up any nail design. I did an array of design from really blingy to more subtle to suit all preferences. Whilst keeping it pastel and pretty.

Sunday, May 12, 2013
Pretty Pastels
I decided since now I have nail art wheels to swatch all my pastel polish. The subtle colours are perfect if you're not feeling quite daring enough to try brights. They are perfect to add a hint of colour to your outfit or even the office as they're not too "in your face".
I love pastel colours for spring and now its nearly over I'm going to get my wears worth!
Nail Polishes from left to right:
Barry M Nail Paint 306 Peach Melba
E.L.F (eyes lips face) Polish Mint Cream
17 Lasting Fix Nail Polish Sherbert Lemon
17 Lasting Fix Nail Polish Mint Choc Chip
17 Lasting Fix Nail Polish Sweet Kisses
17 Lasting Fix Nail Polish Parma Violet
Barry M Nail Paint 308 Berry I/C


